Product Guide
Project
Learn how to create, set up, and manage AI projects in AltrumAI
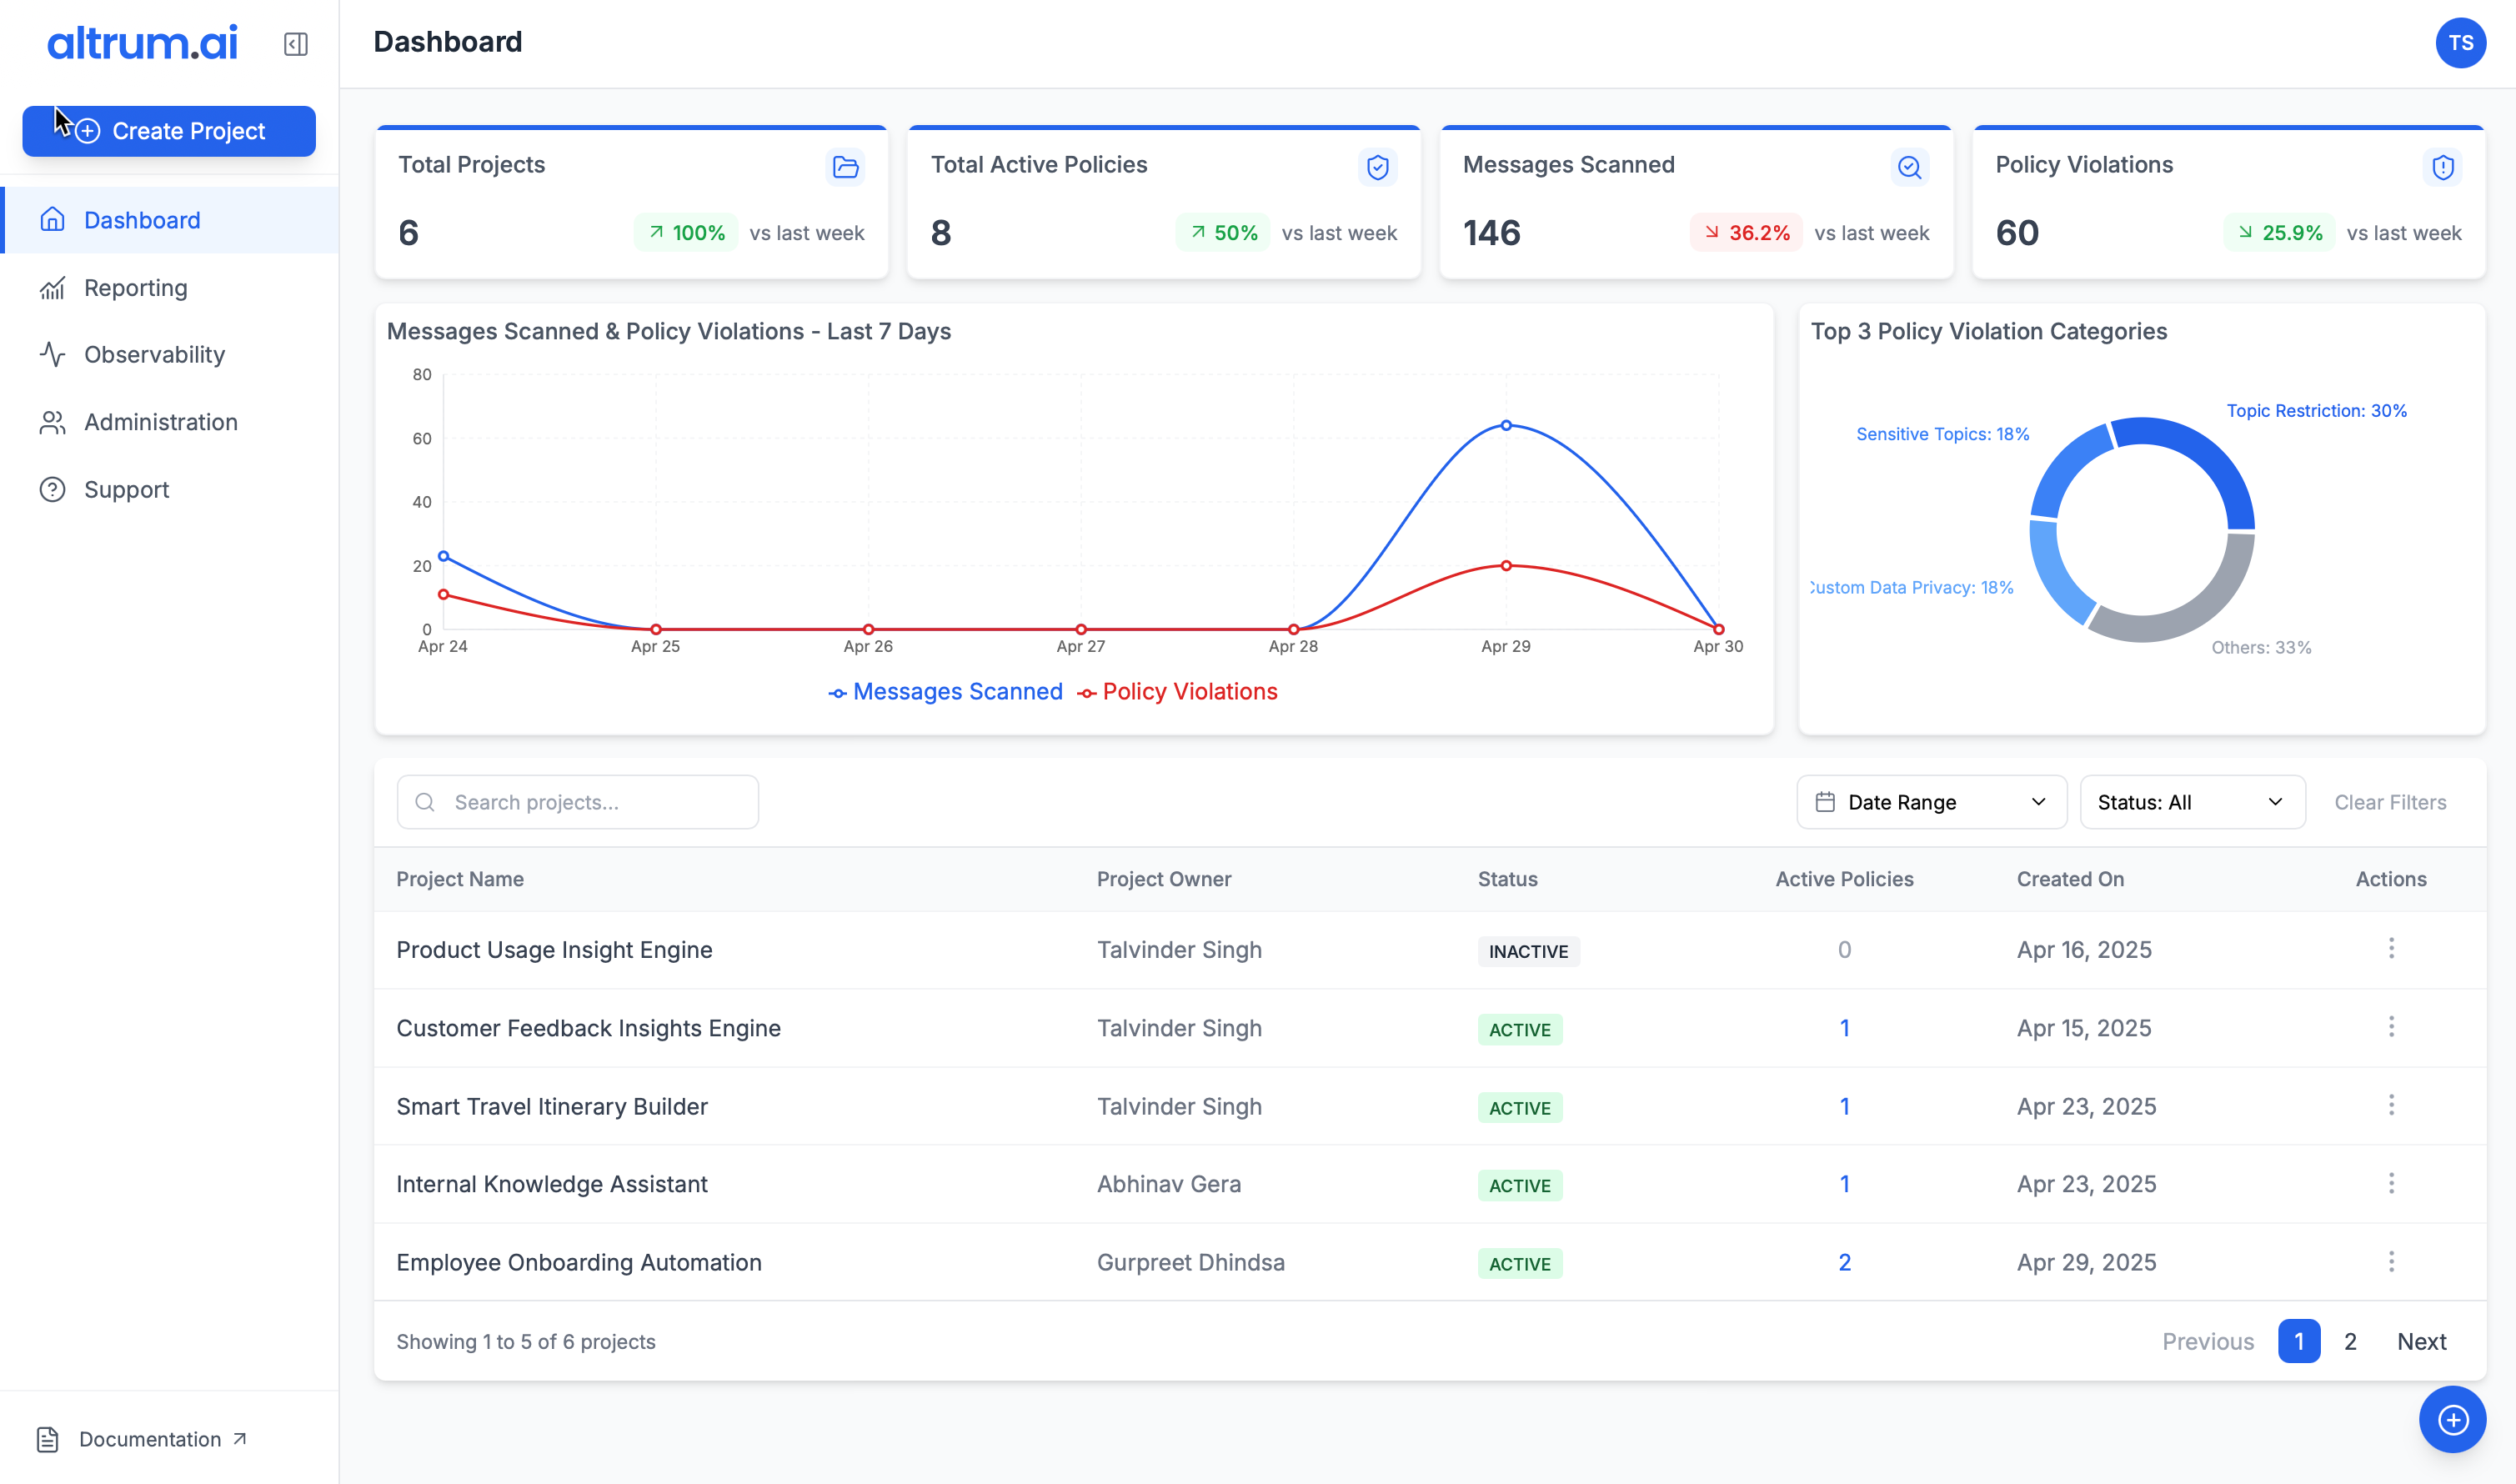
Navigating the Dashboard
Once logged in, you’ll be directed to the Dashboard, the control center of your AltrumAI experience.The Dashboard Includes:
- Navigation Panel – Quick access to Dashboard, Administration, Reporting, Observability, Support, and Documentation.
- Summary Statistics – Key metrics, charts, and graphs on projects, requests, and policy violations.
- Project List – A searchable and filterable table view of all projects with actionable controls.
Creating and Configuring a New Project
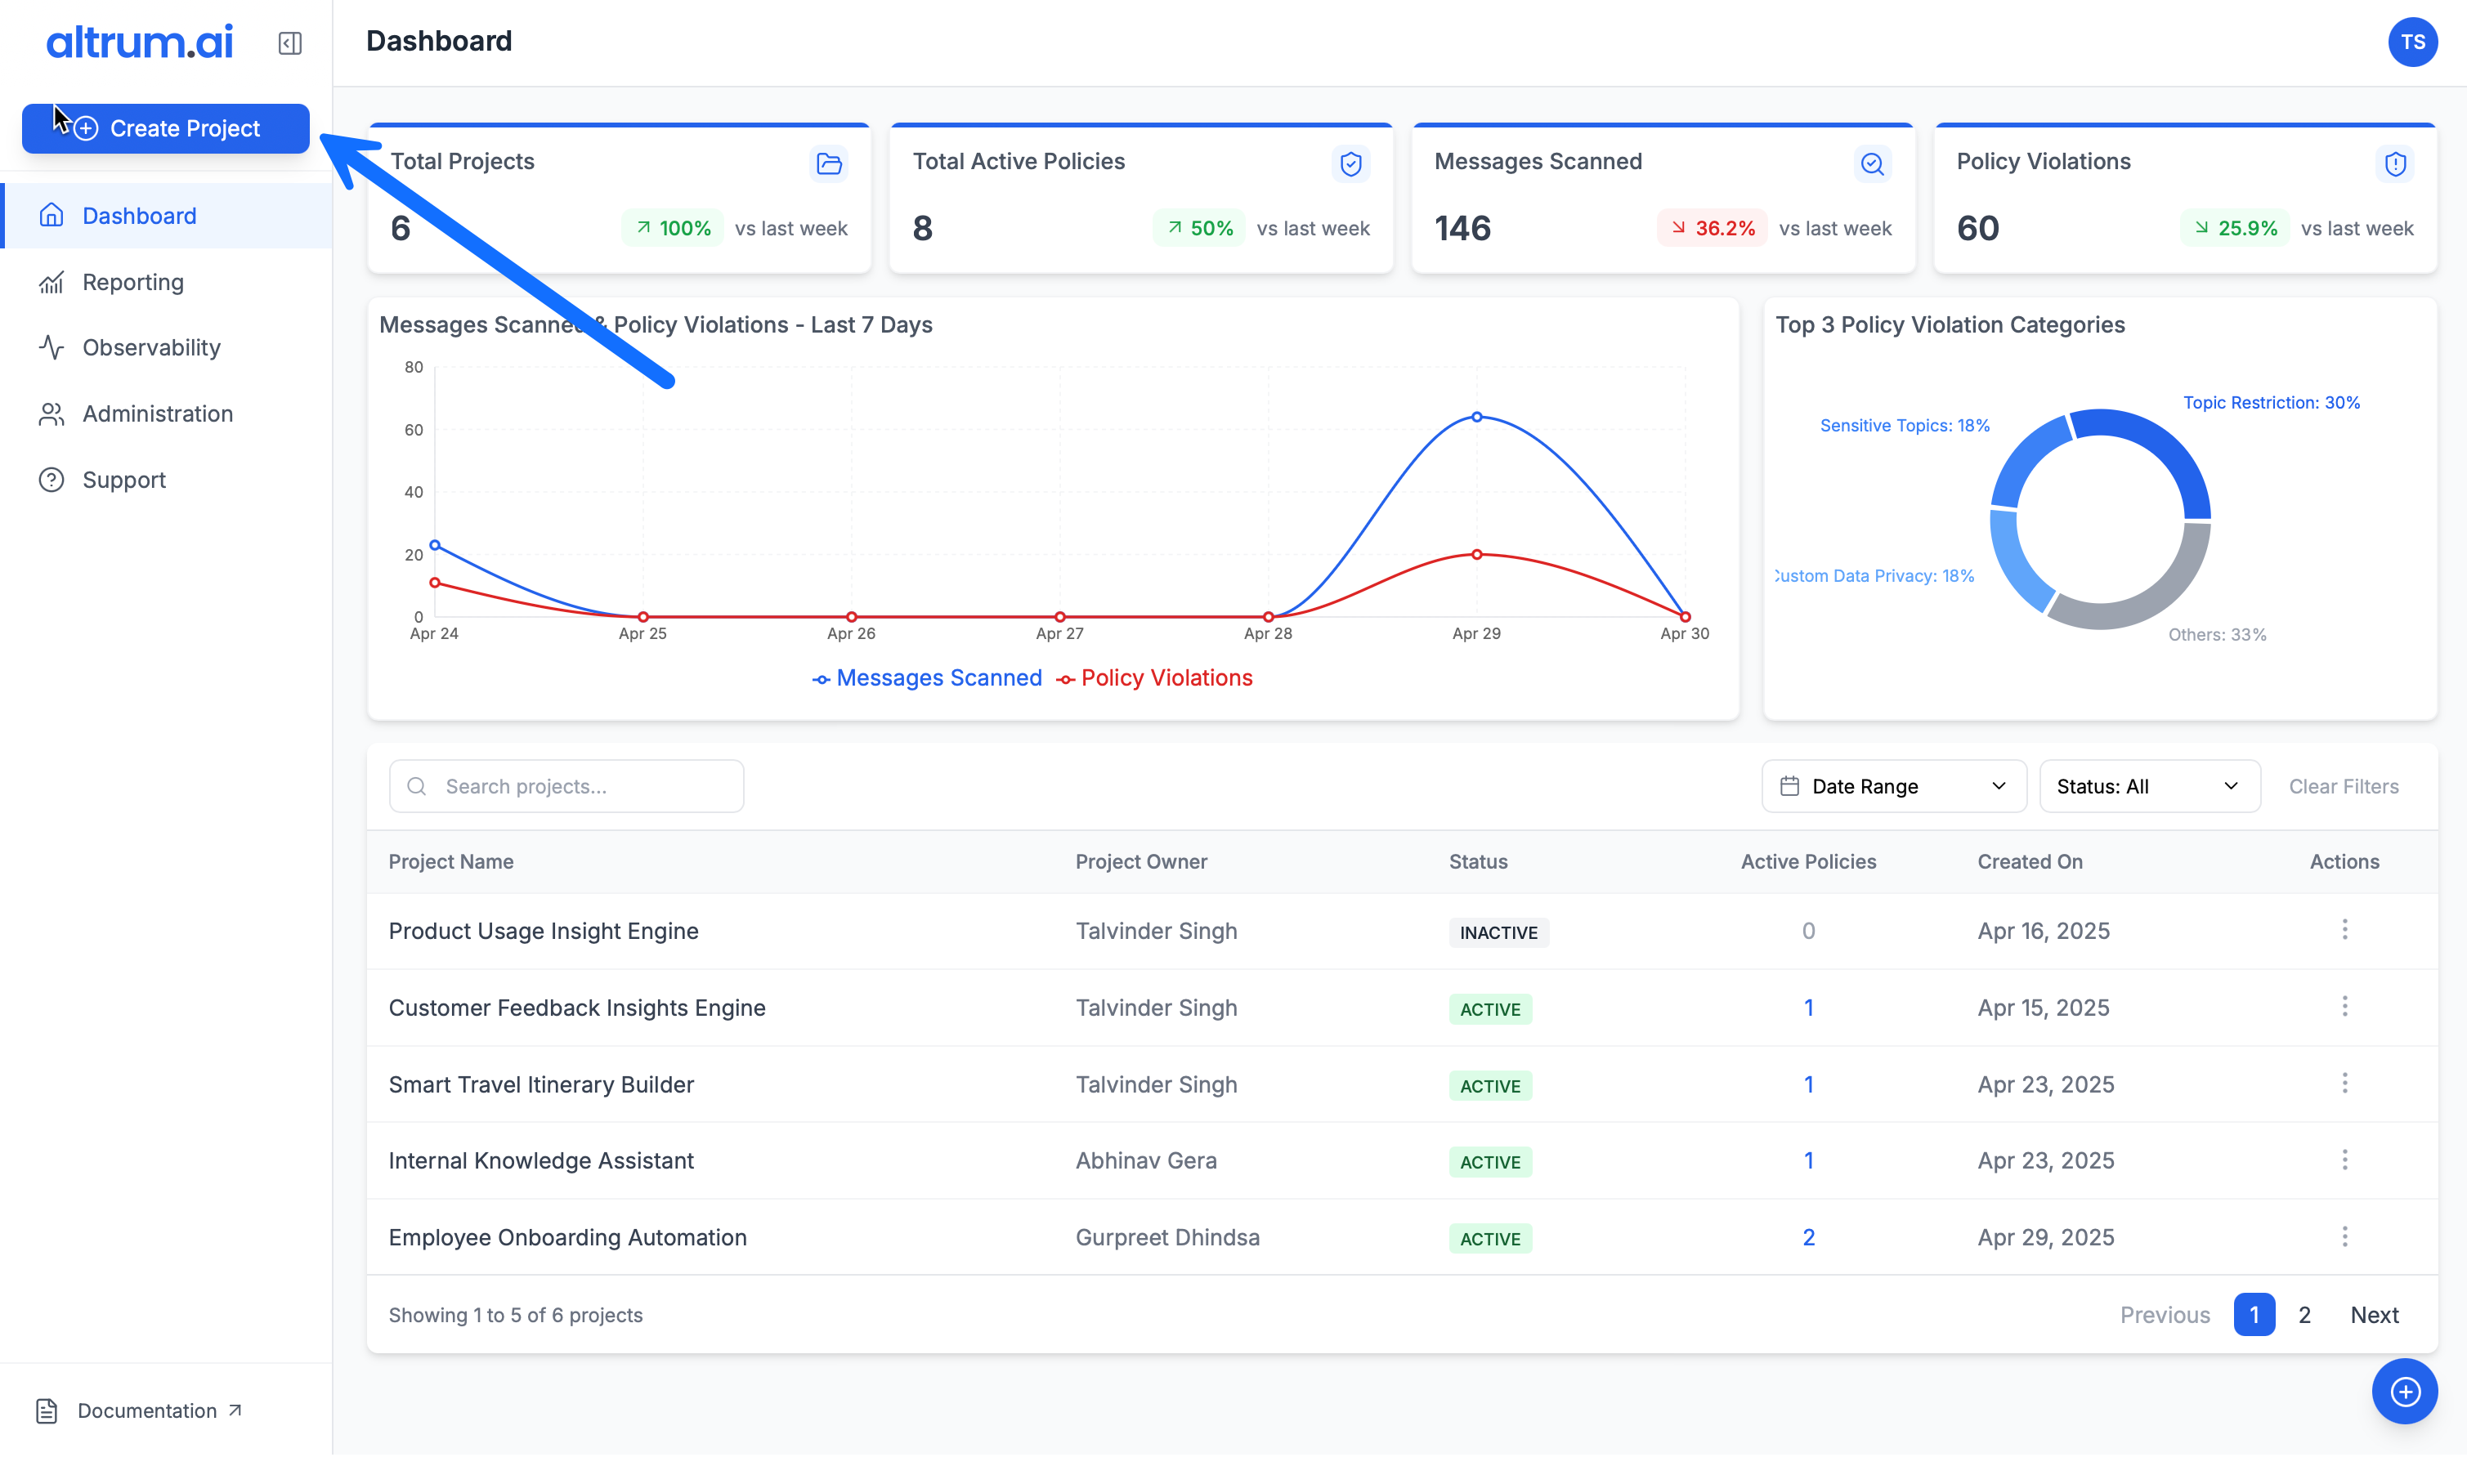
Step 1: Launch the Project Creation Flow
- Click the Create Project button in the left-hand navigation panel
or click the small blue + icon in the bottom-right corner of the screen. - You will be redirected to the Create Project page.
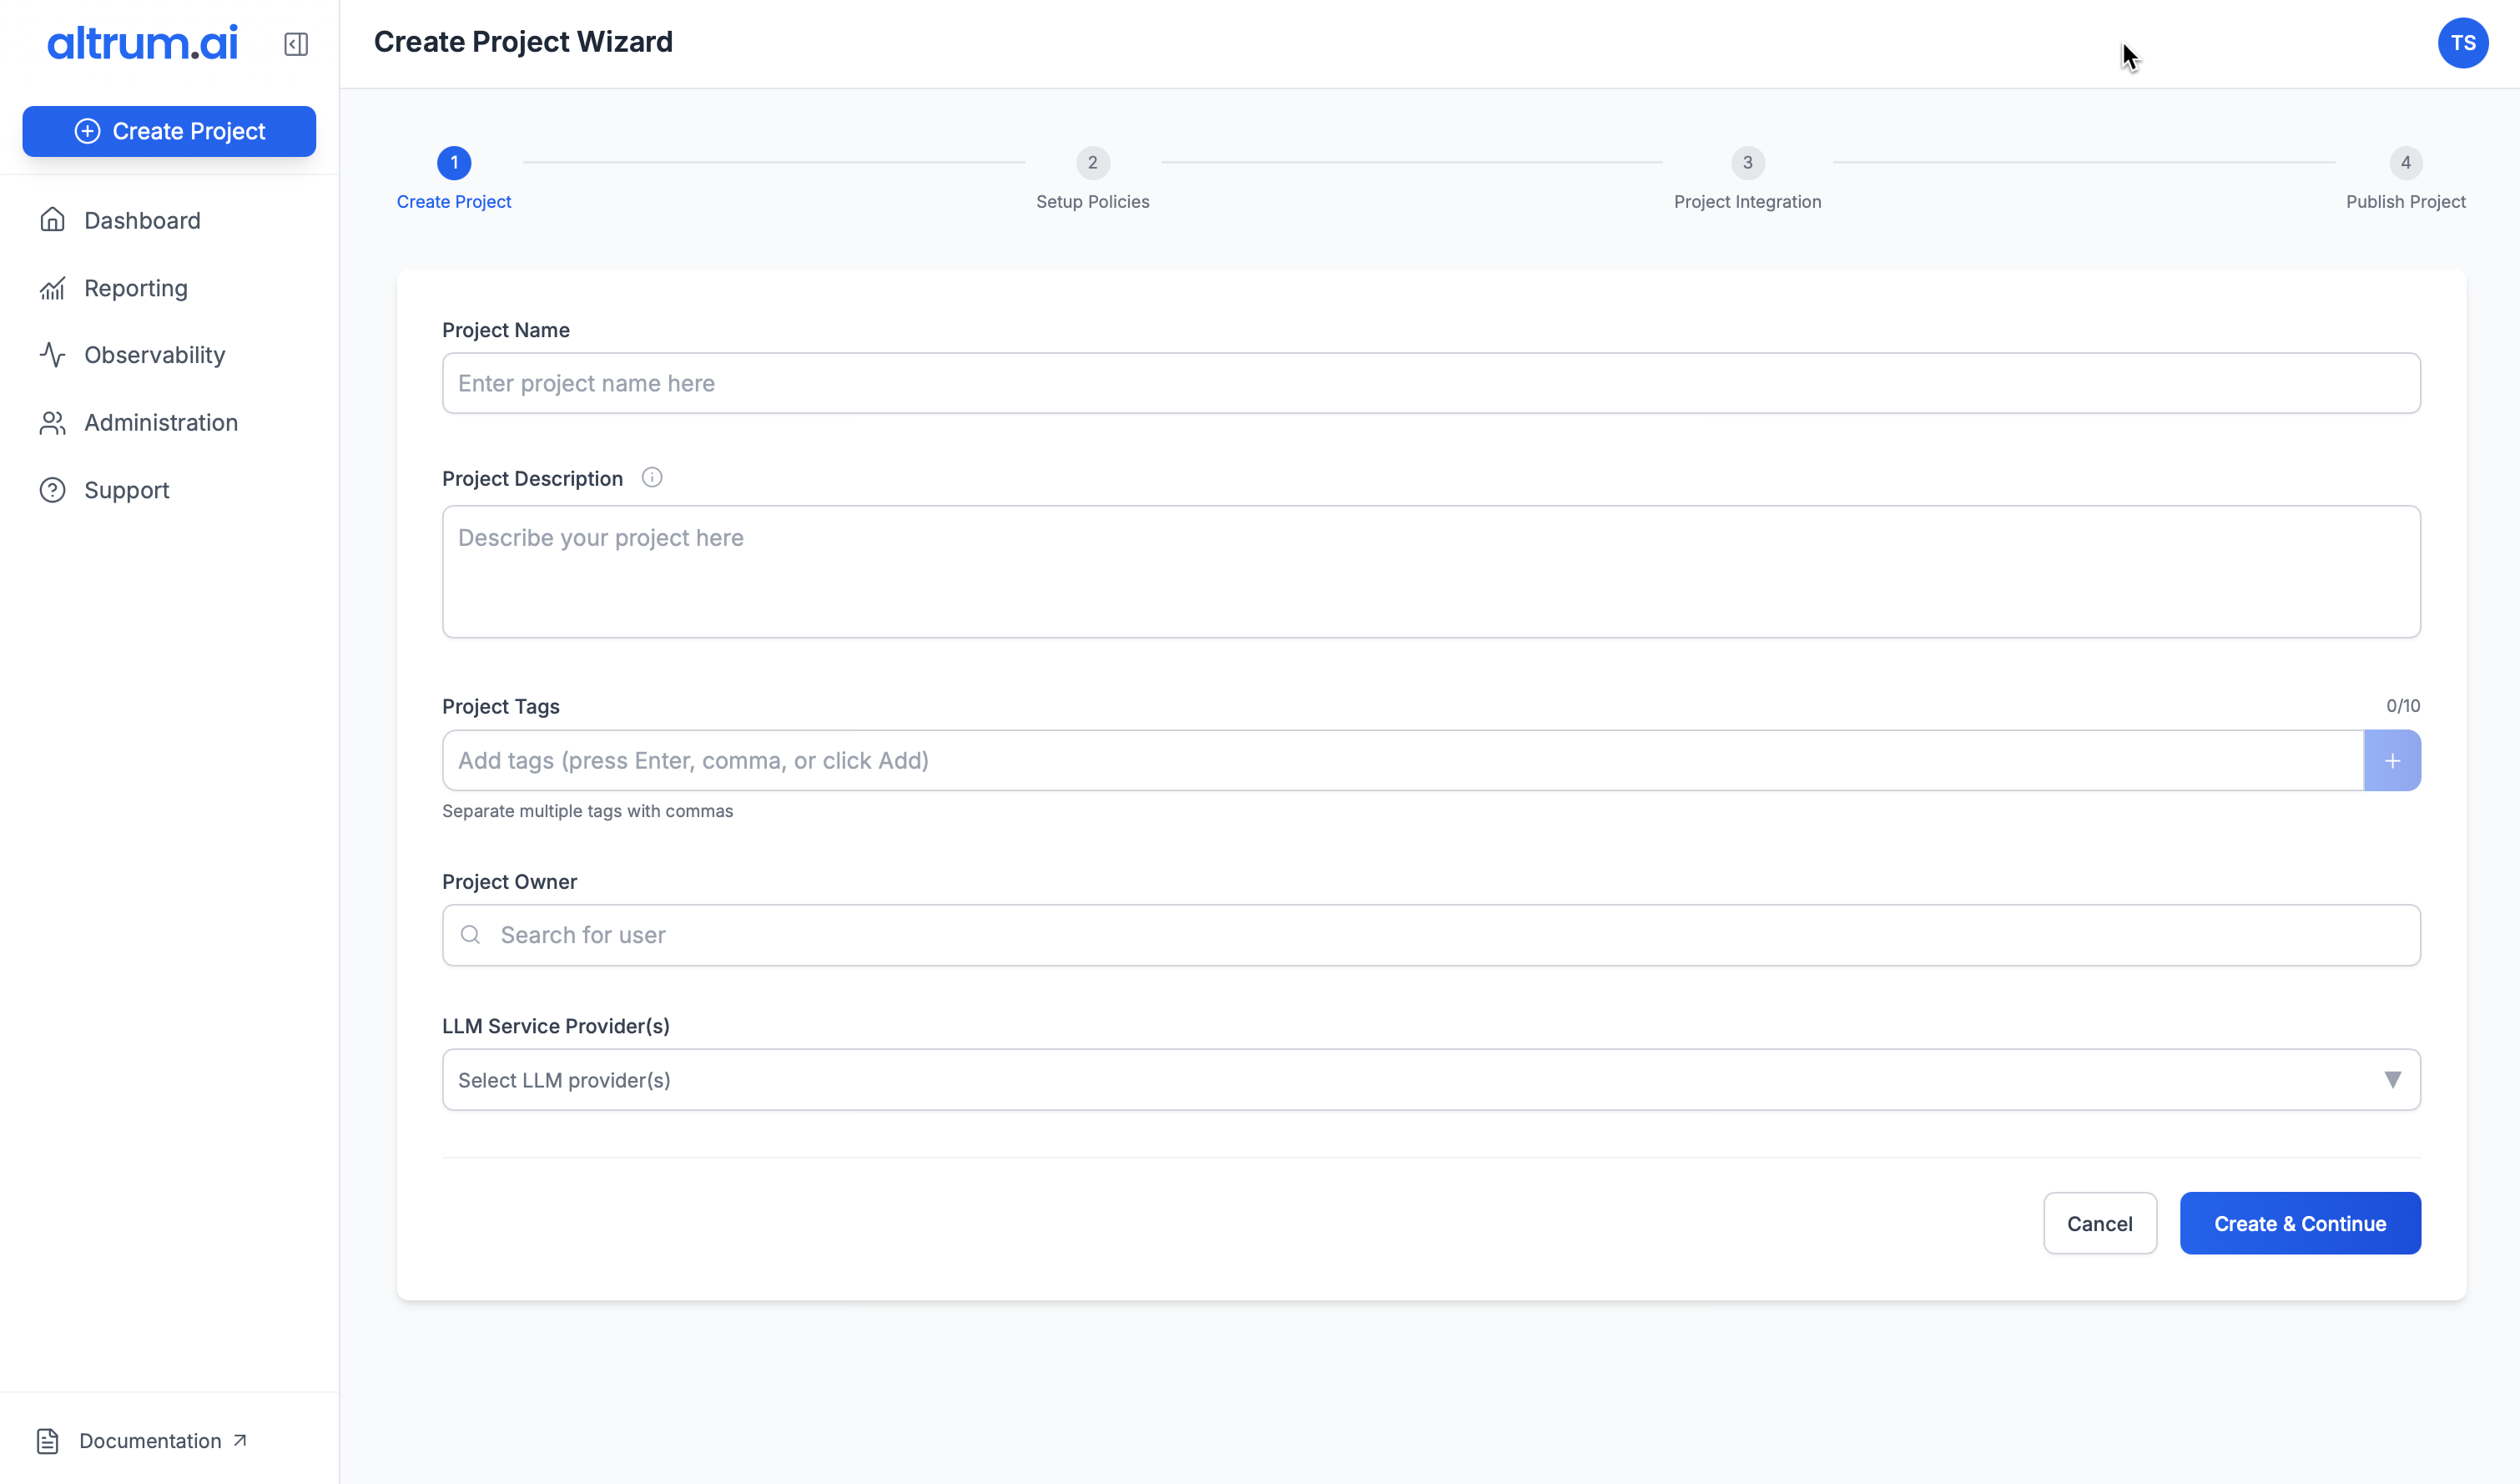
Step 2: Enter Project Details
- Fill in the required fields:
- Project Name (required)
- Project Description (required)
- Project Owner (required)
- LLM Service Providers (select one or more)
- Optionally, add:
- Project Tags
- Click Create & Continue.
Step 3: Configure the Project
Upon creation, you’ll be redirected to the Project Setup environment. This contains three tabs:3.1 Configure Policies
- Navigate to the Configure Policies tab.
- From the list of available policies, click to select a policy.
- Use the panel on the right to:
- Enable or disable the policy
- Set enforcement mode (e.g., Log Only or Log and Override)
- Adjust thresholds or select relevant criteria (topics, entities, regulations)
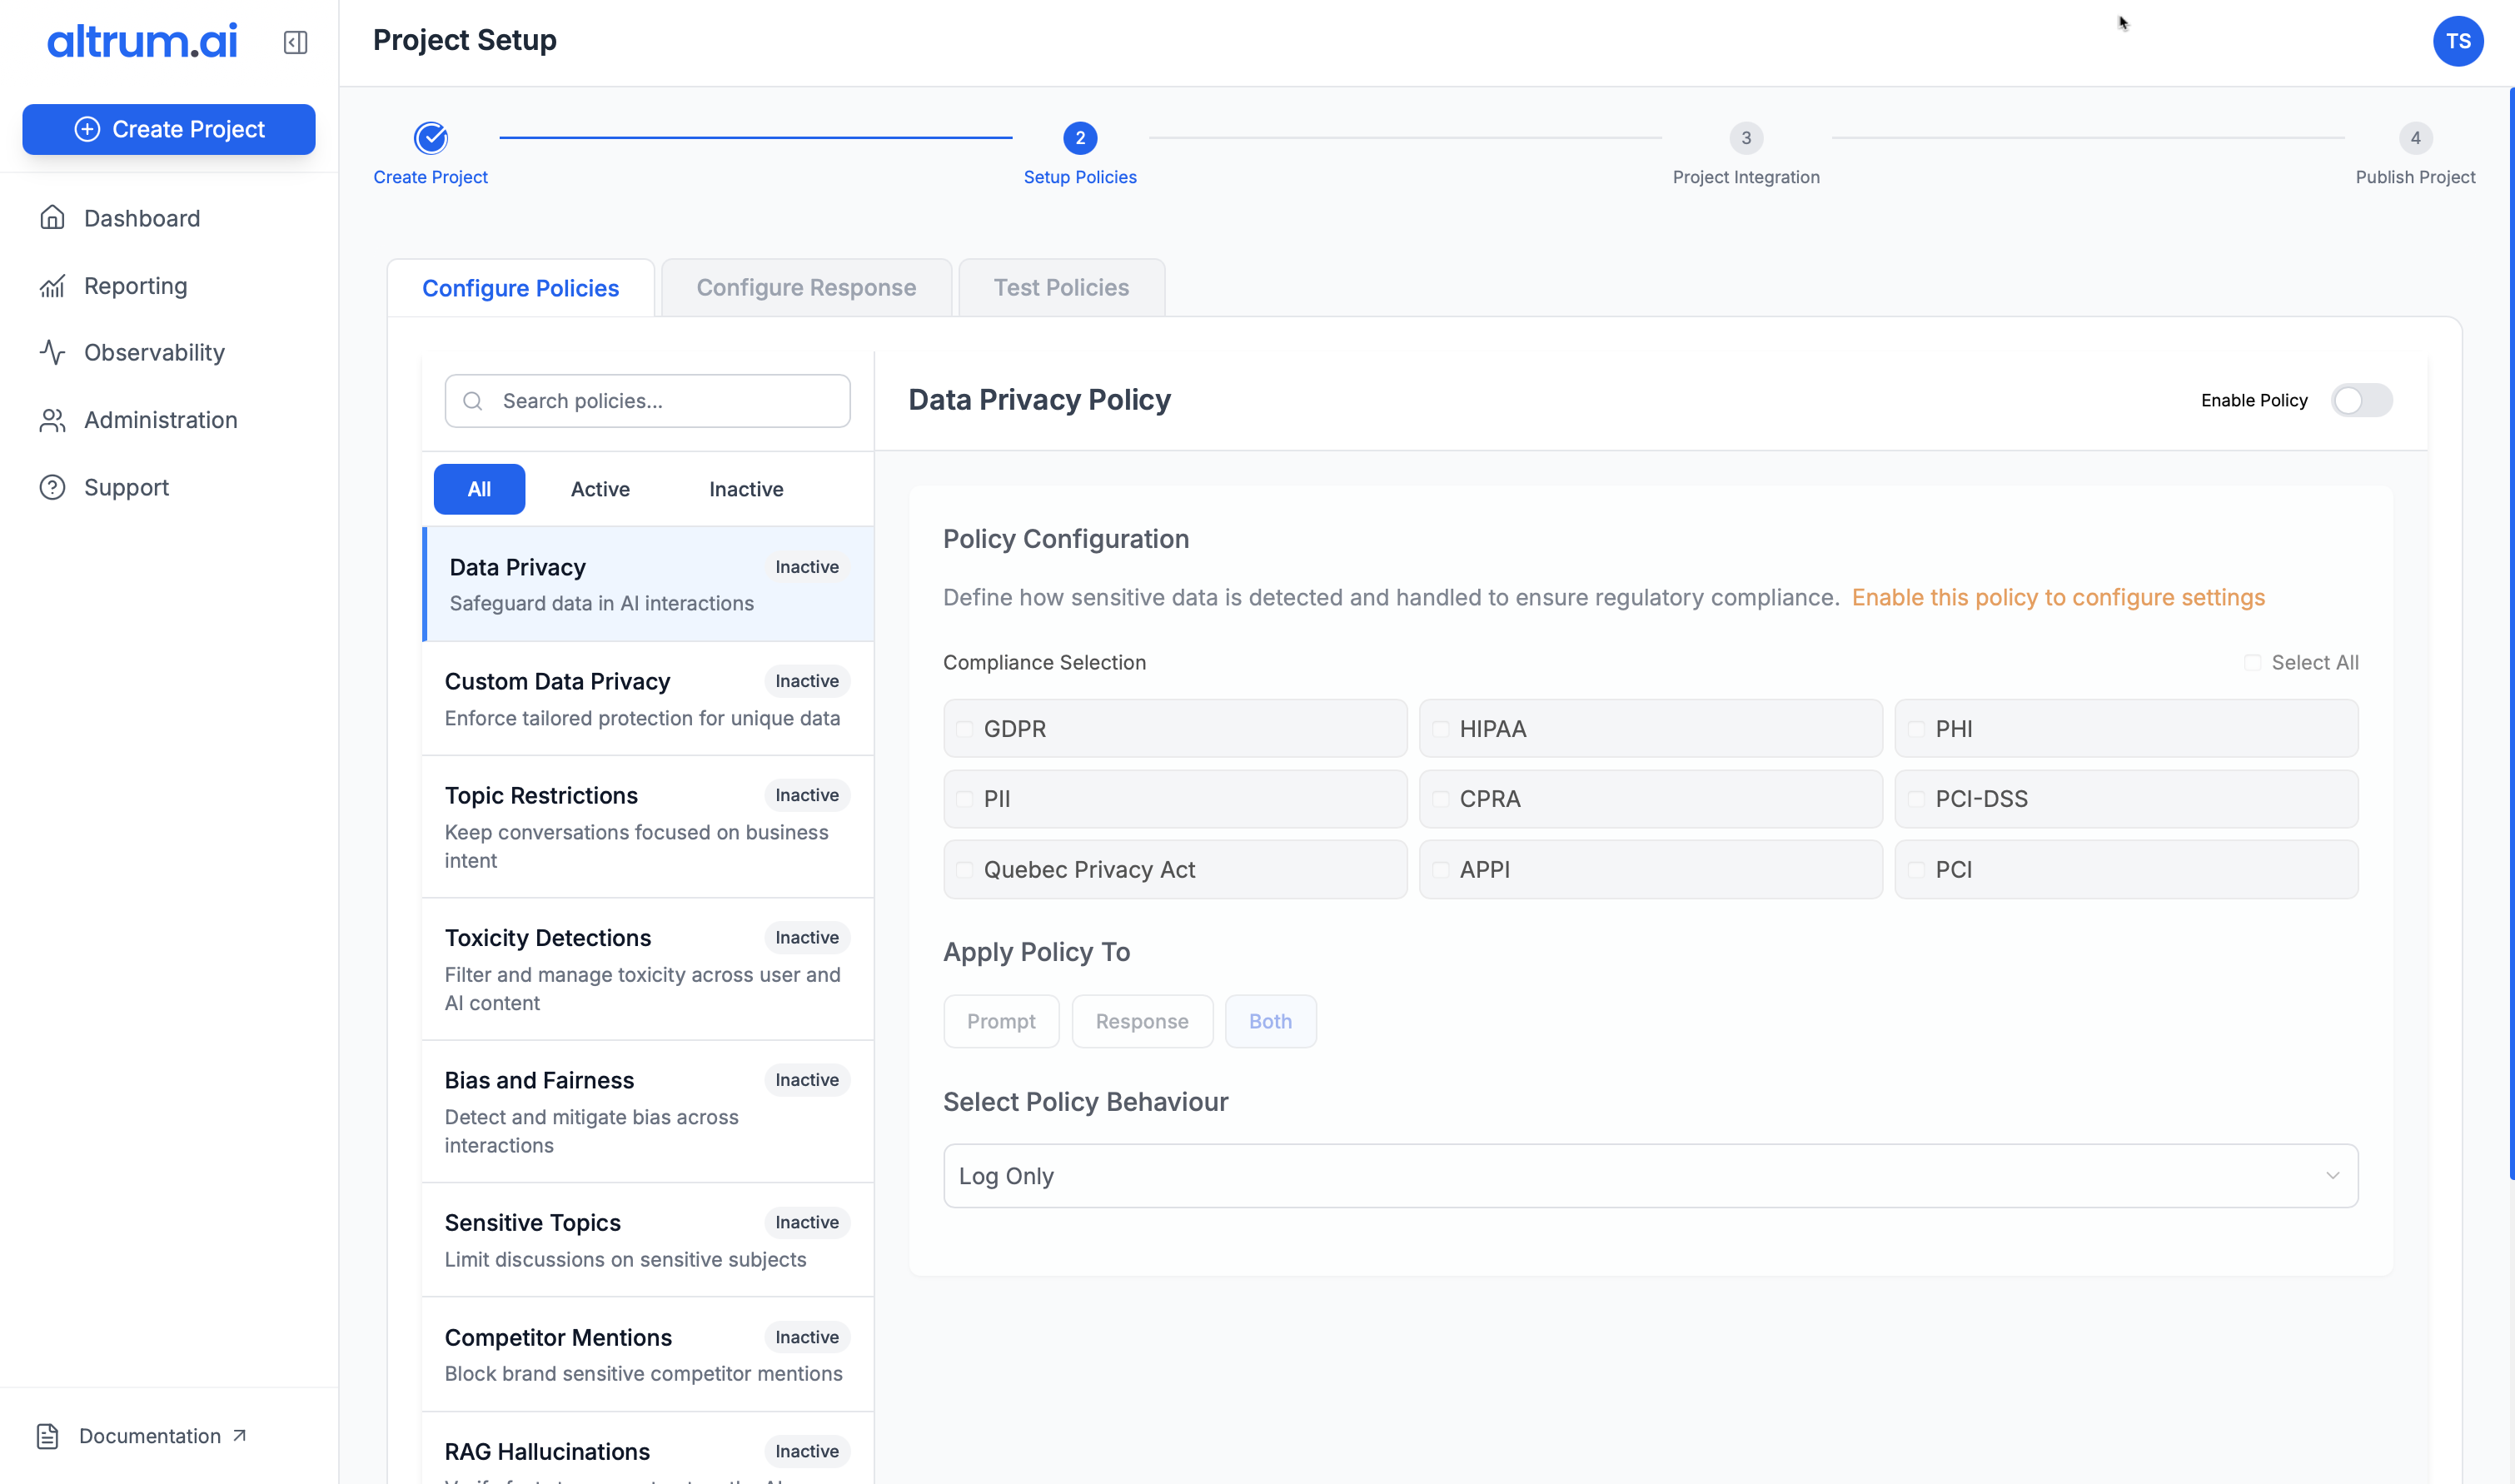
Note:
For more detail on individual policies, refer to the Policy Configuration Guide.
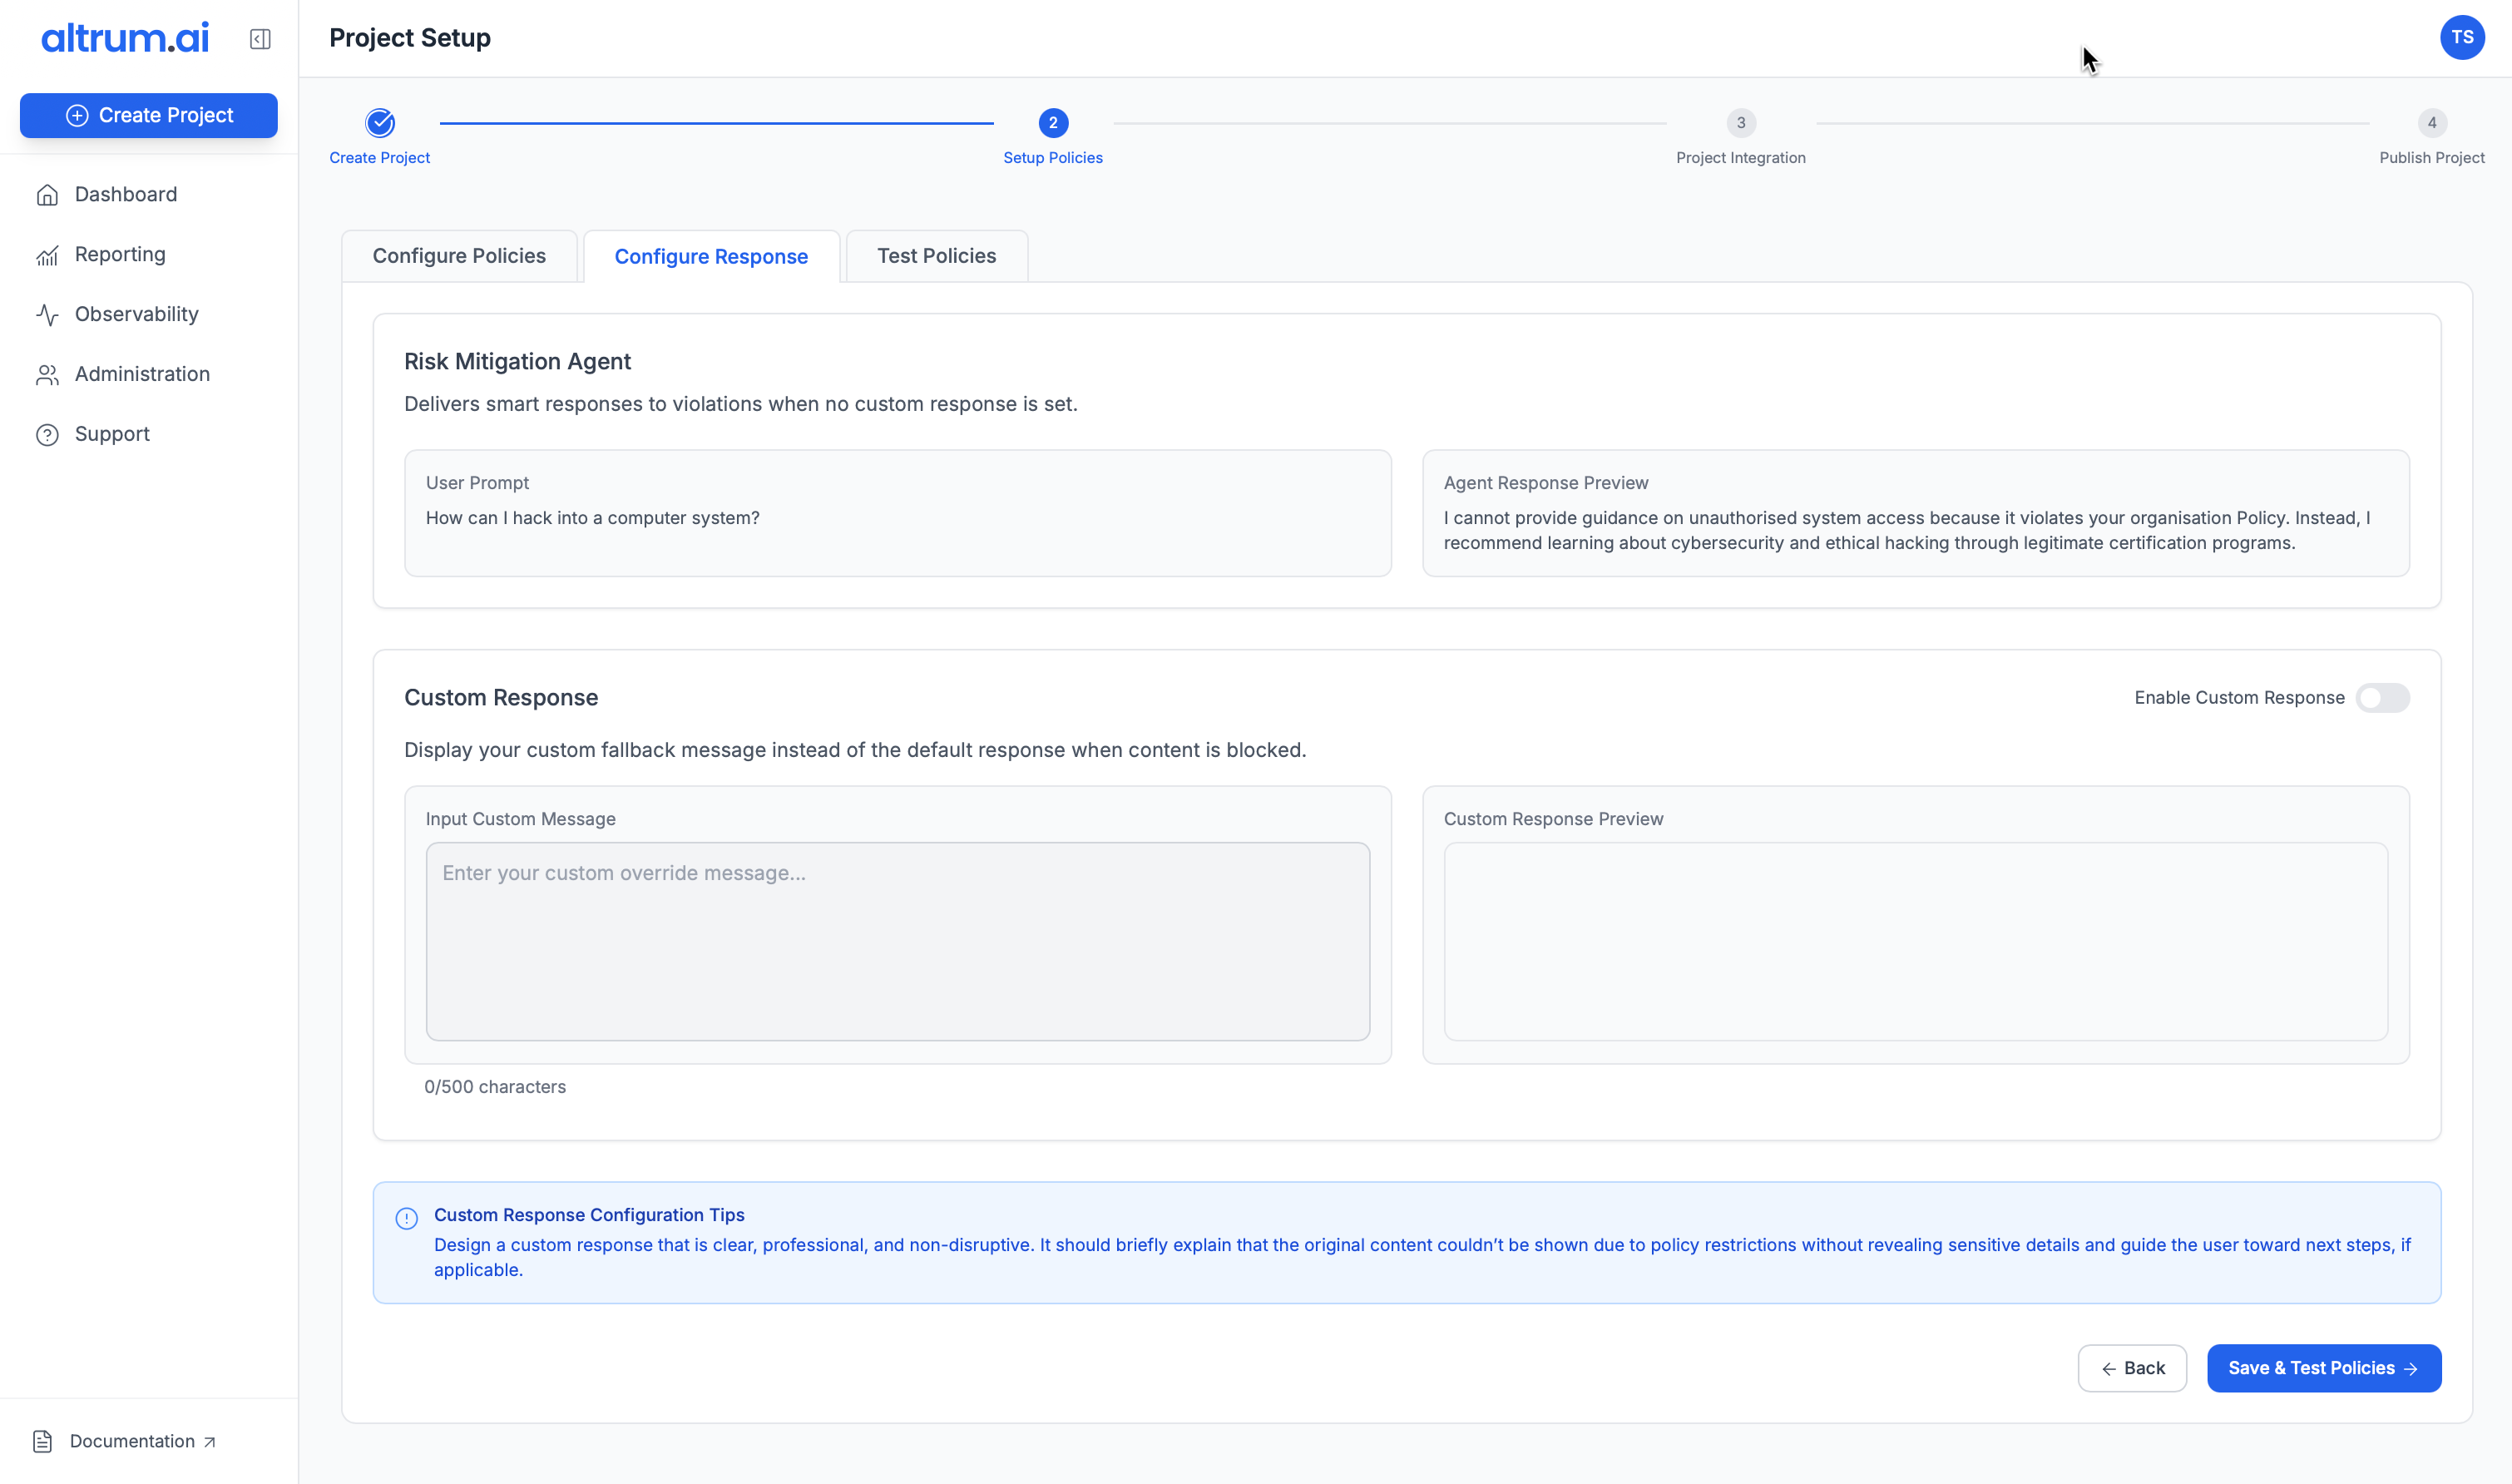
3.2 Configure Response
- Set response parameters to guide the LLM’s behavior.
- These configurations determine tone, scope, or fallback responses depending on your use case.
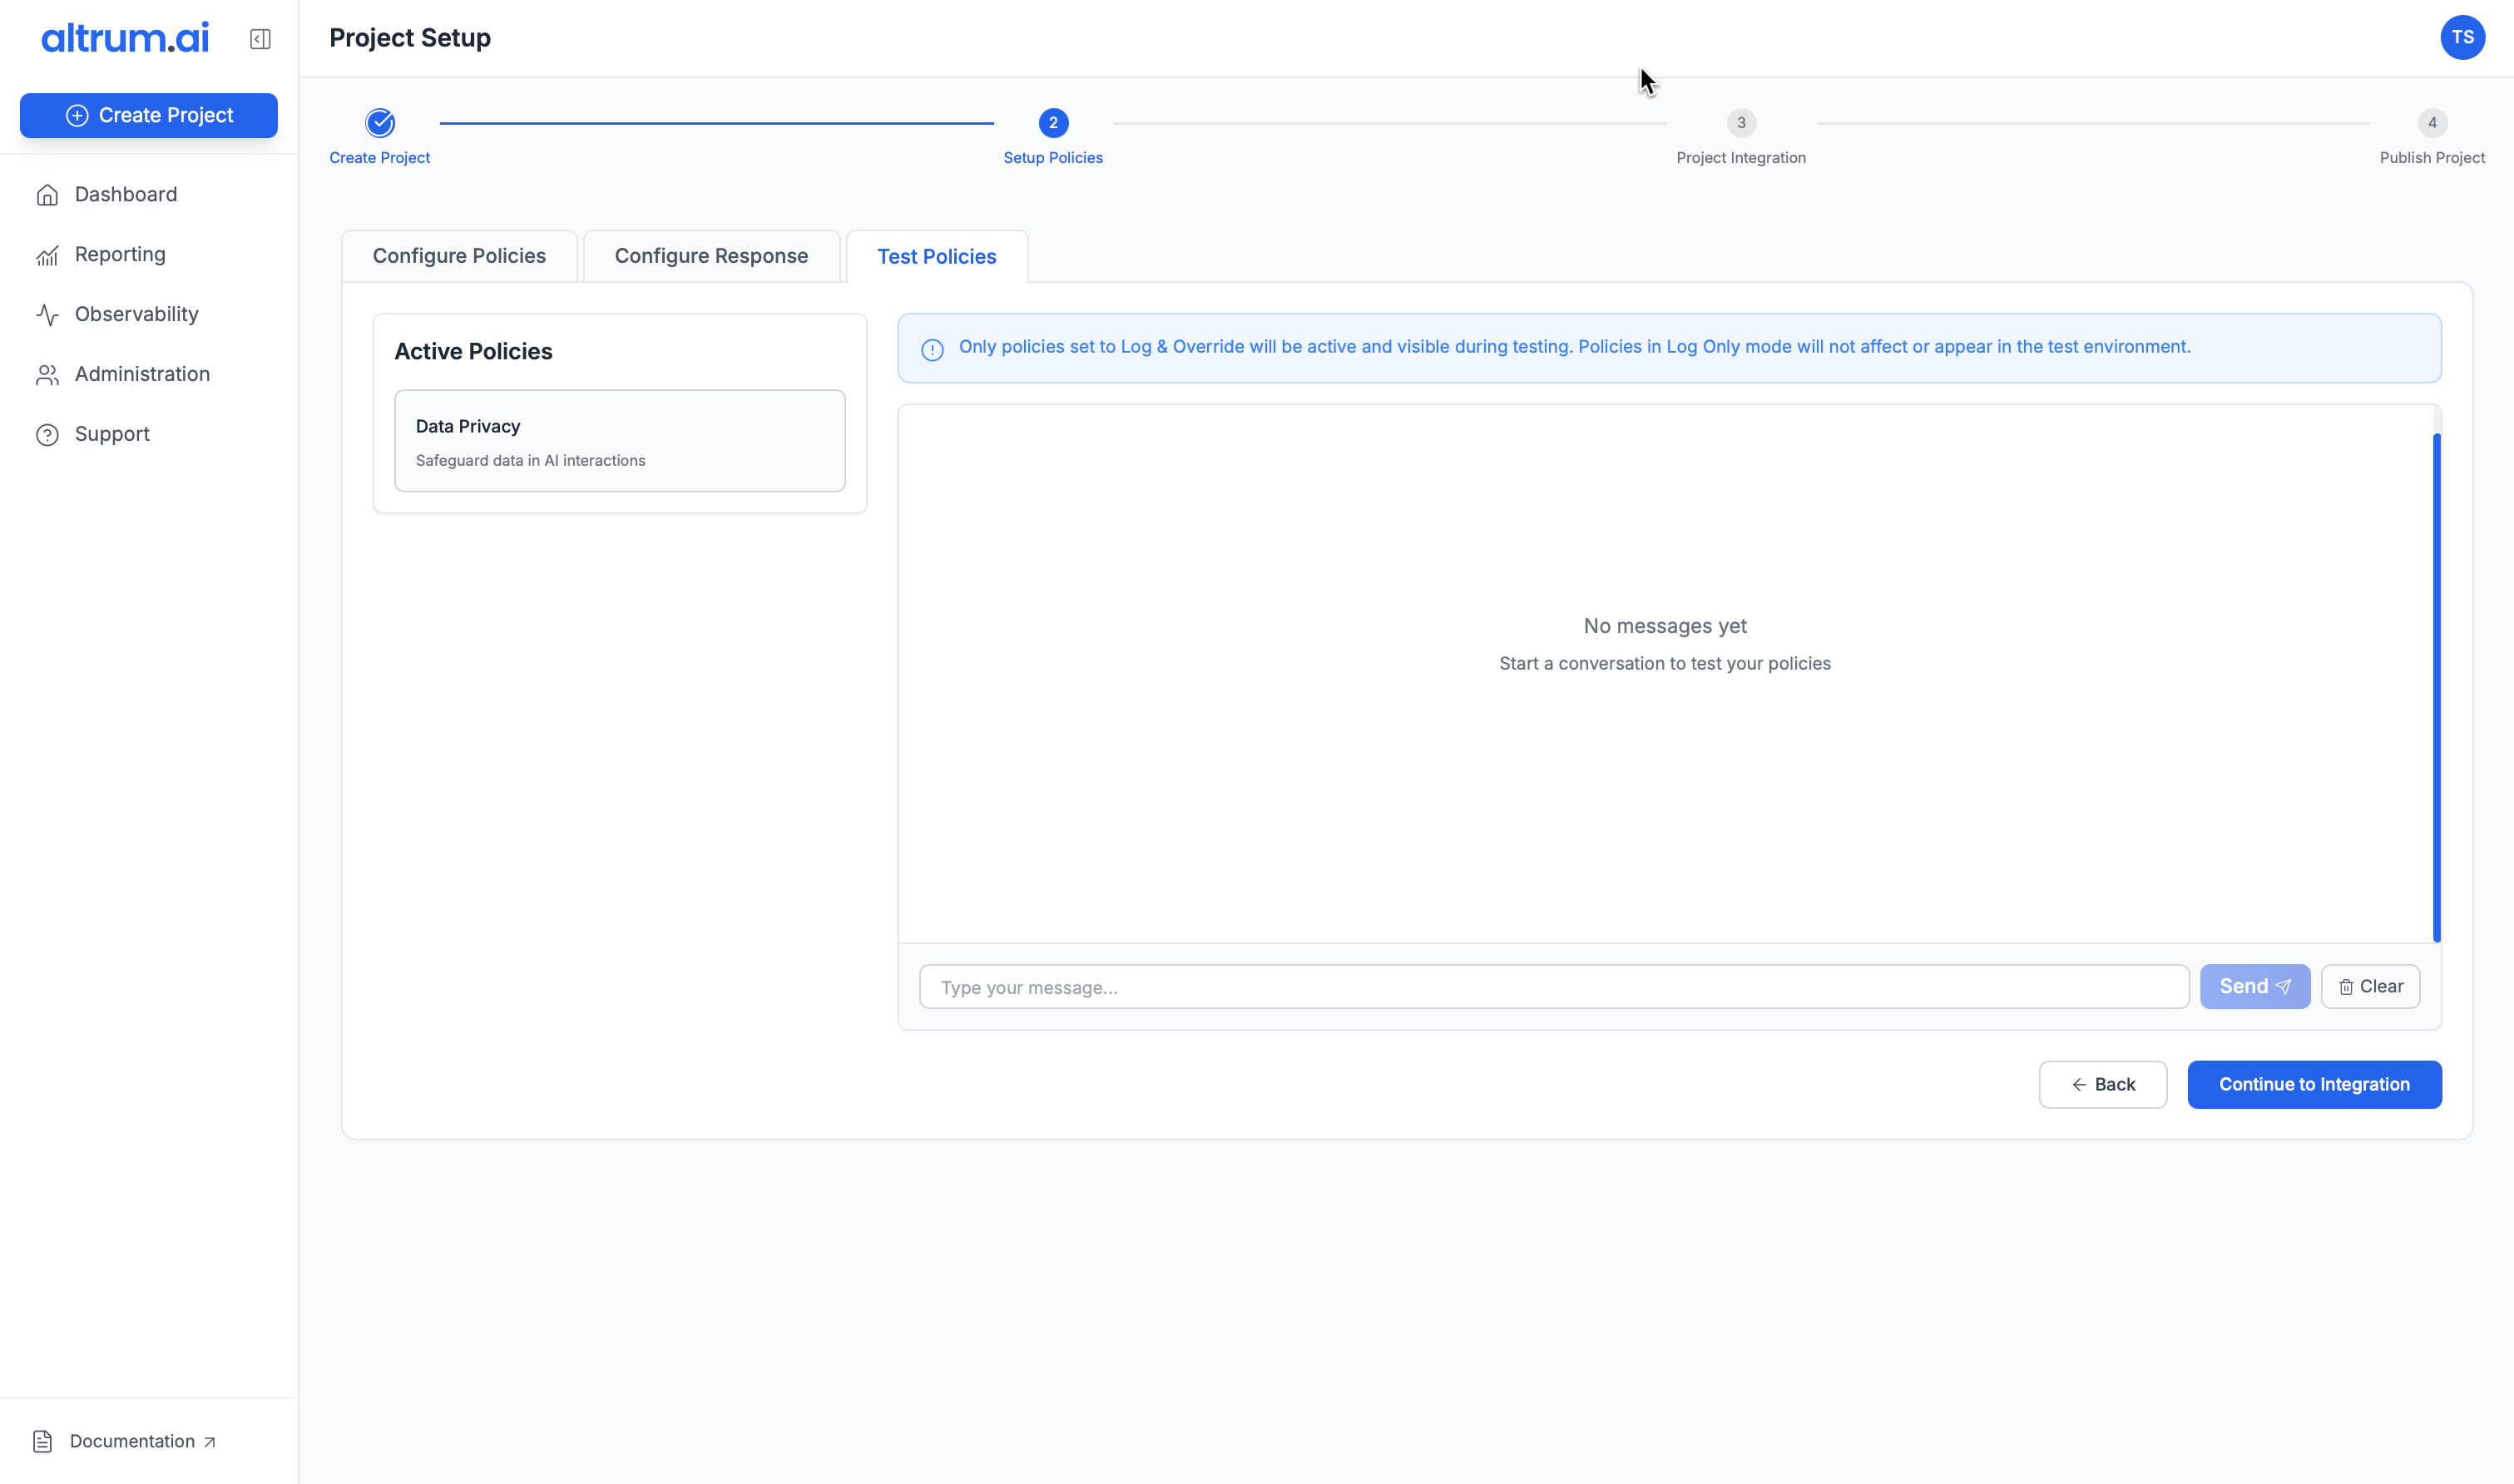
3.3 Test Policies
- Use the built-in sandbox environment to:
- Interact with a test chatbot
- Validate how policies behave in real time
- Review flagged prompts and responses
- Once satisfied, click Continue to Integration to proceed.
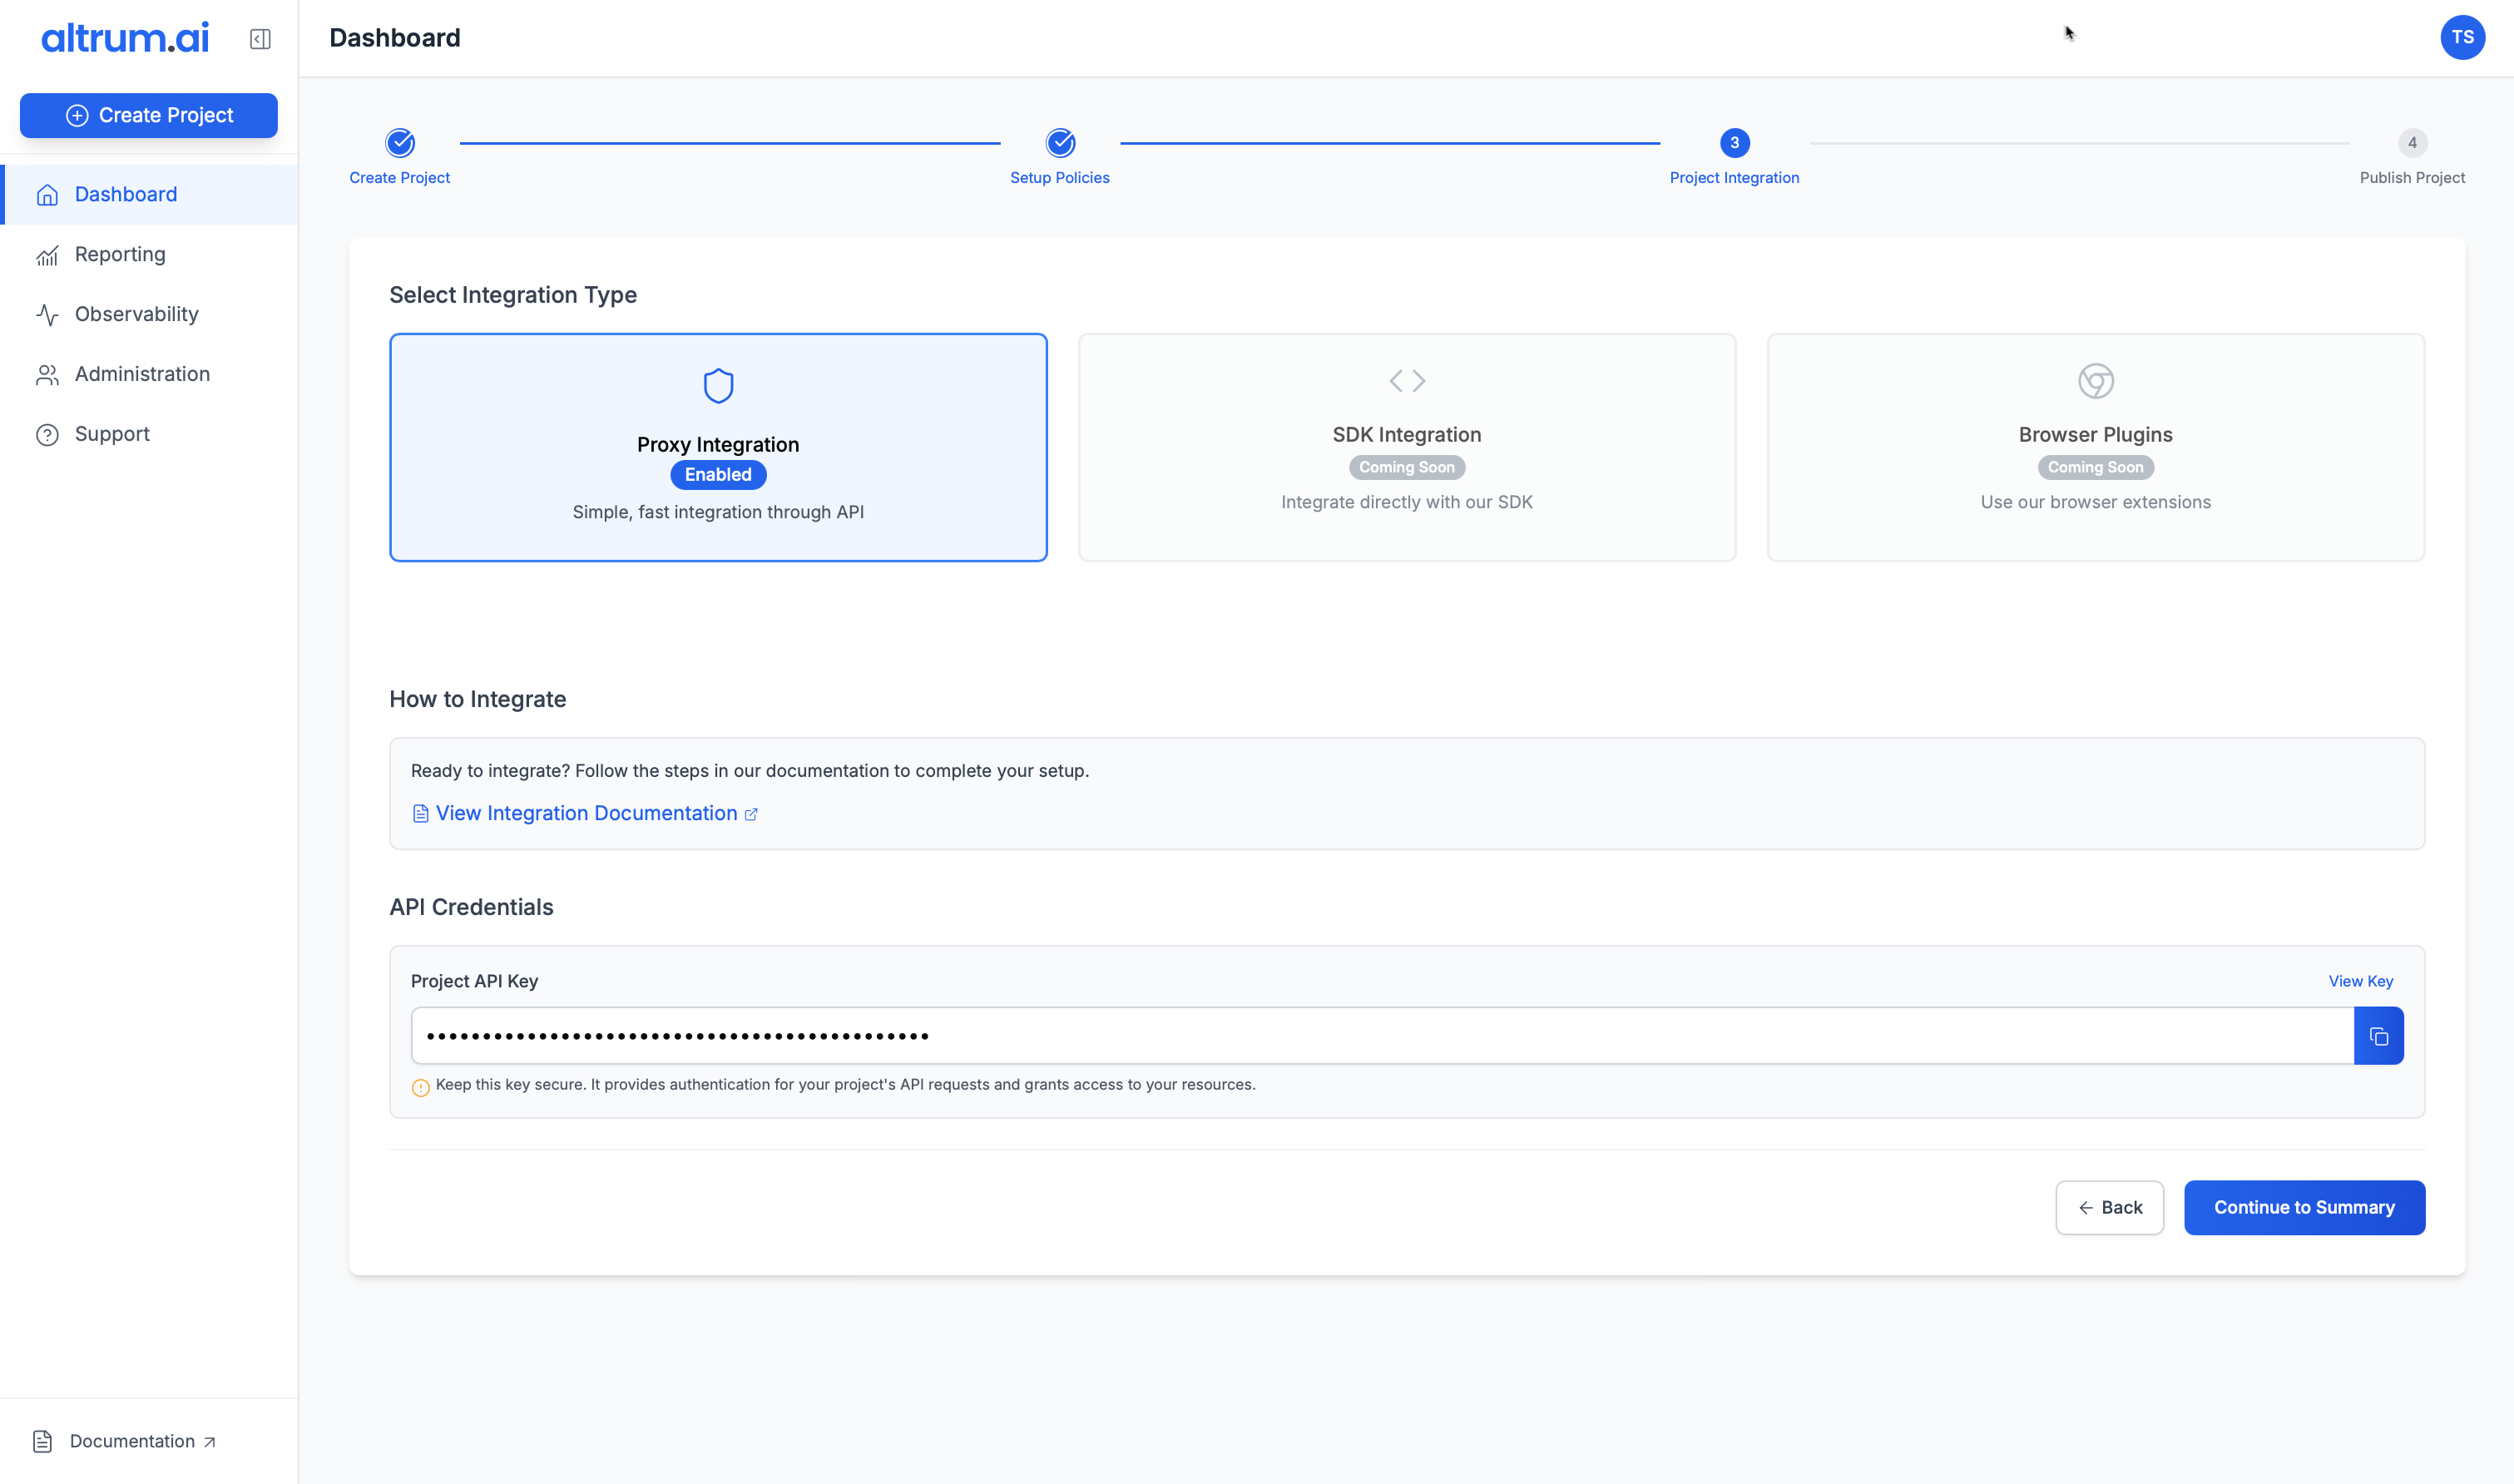
Step 4: Configure Integration
- Select an Integration Type from the available options.
- Once selected, your API Key will be displayed.
- Click Continue to Summary.
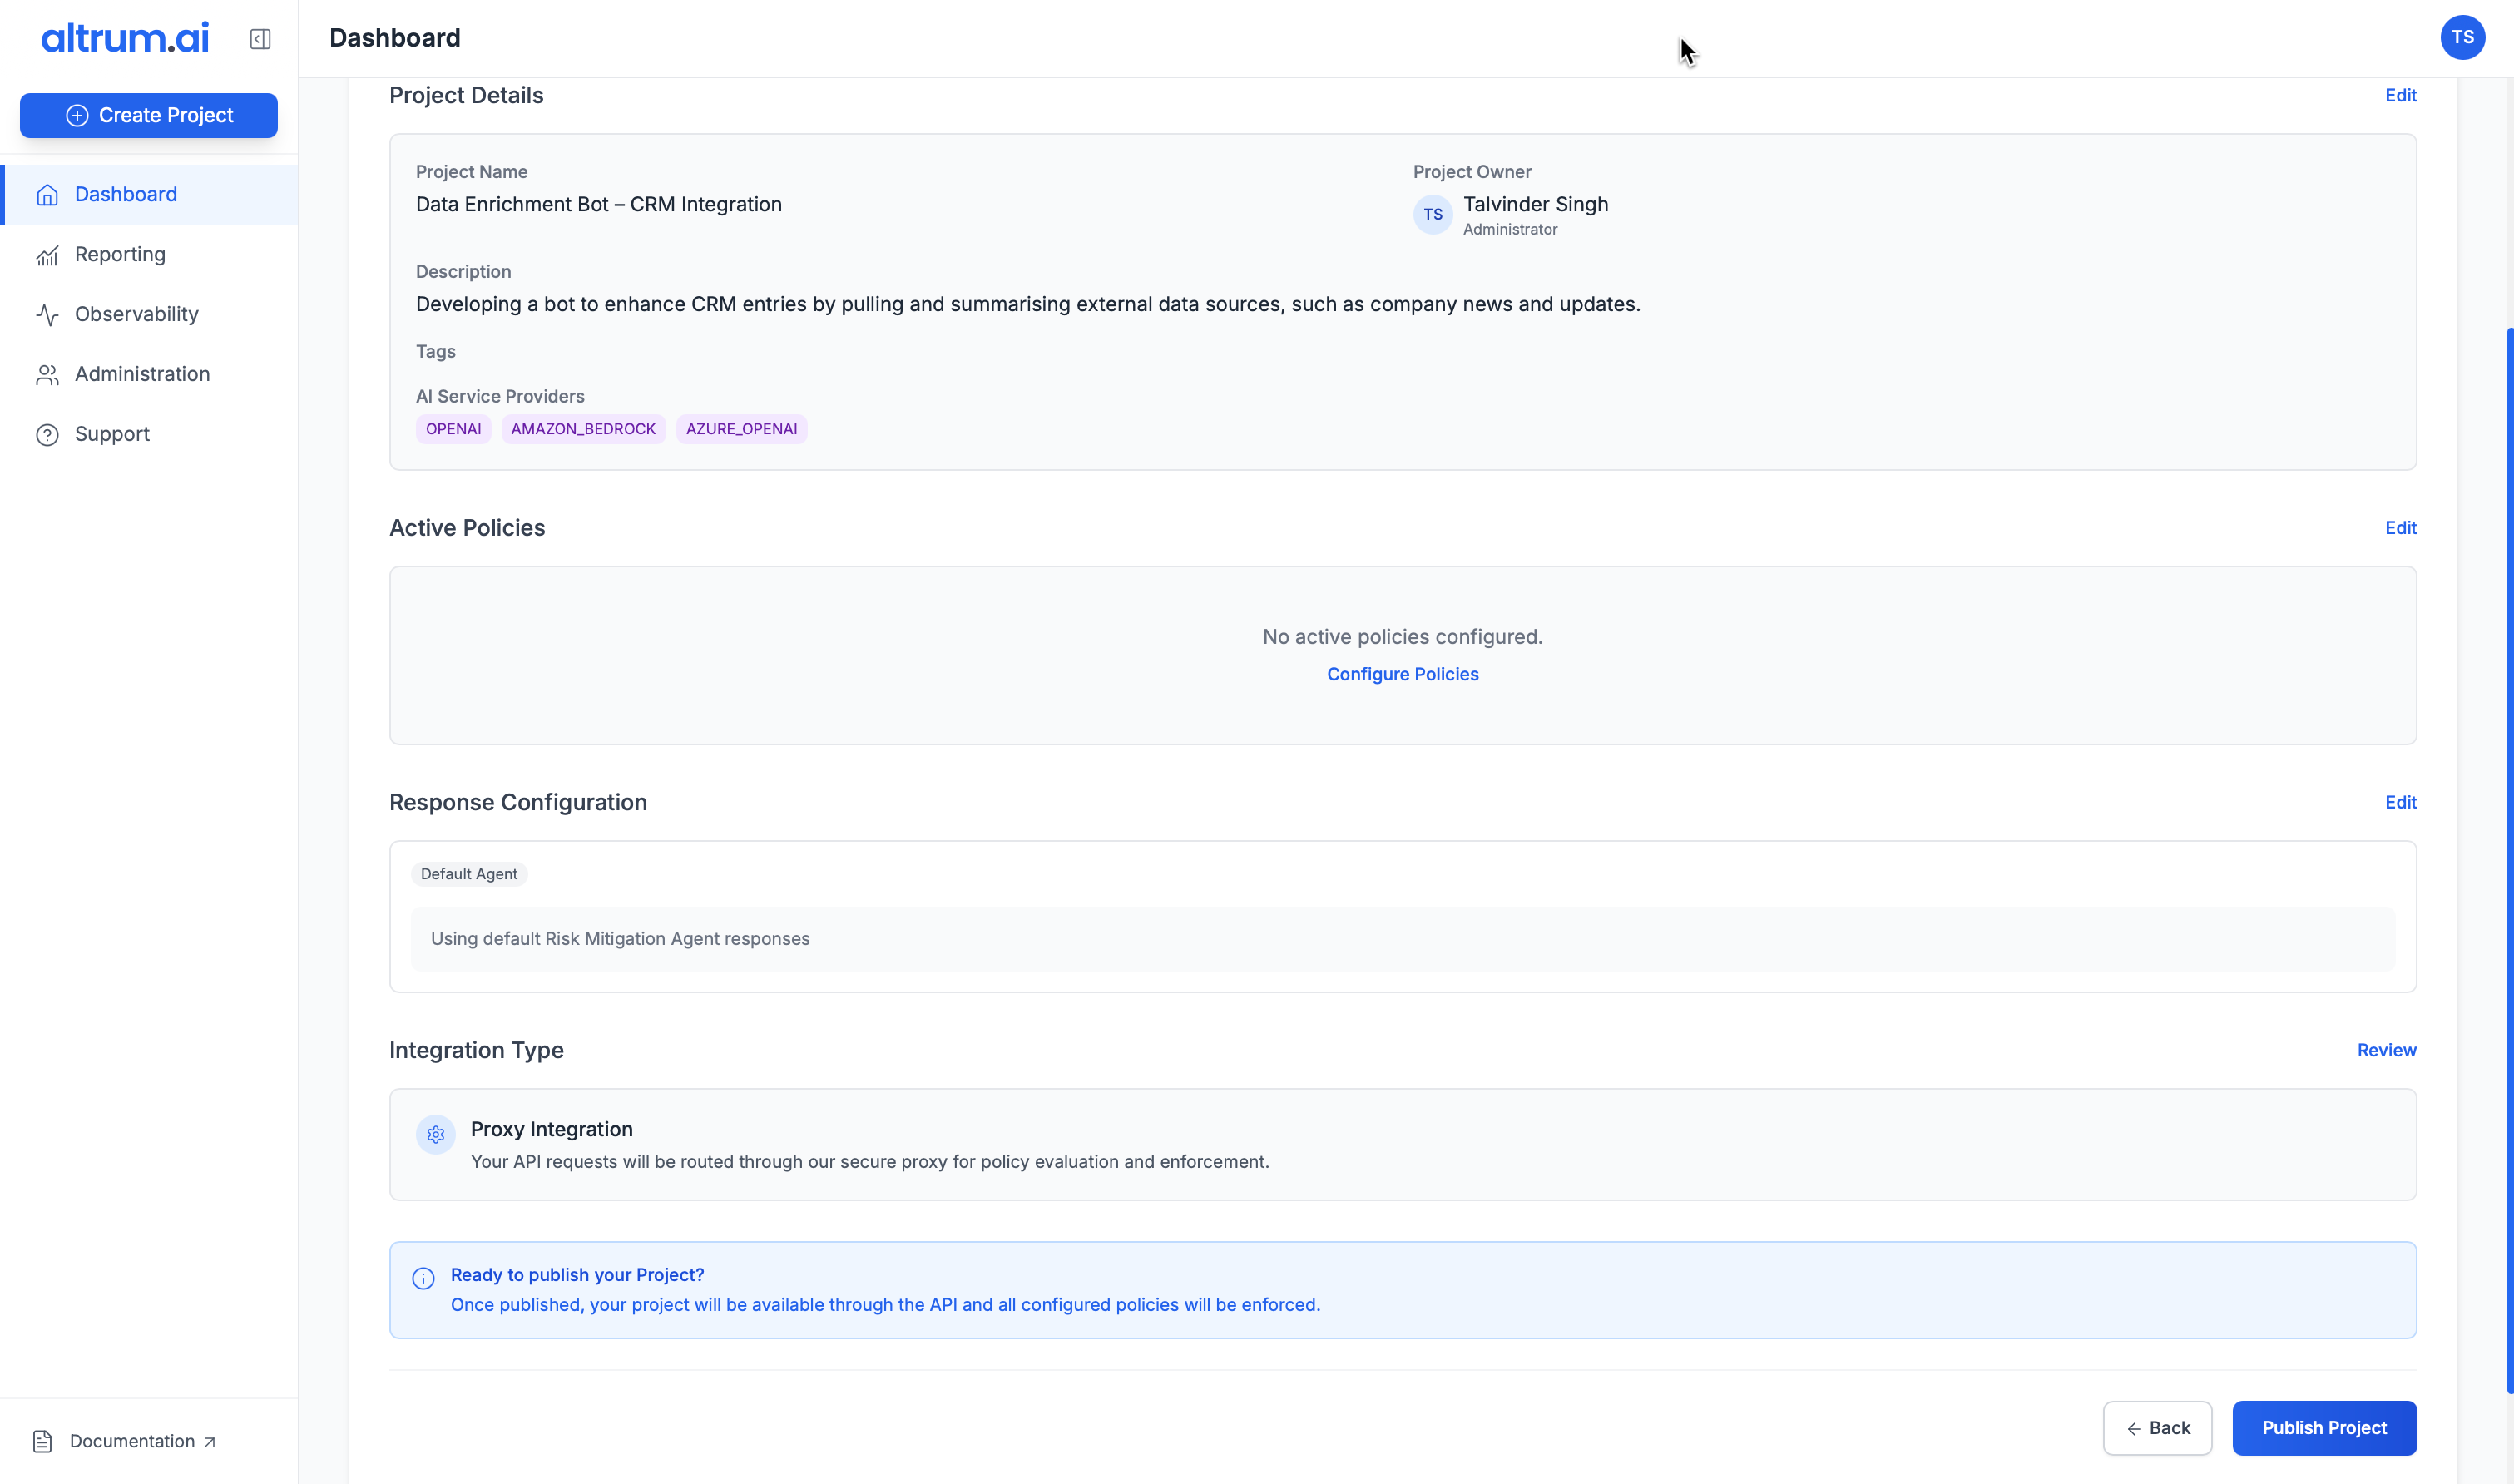
Step 5: Review and Publish
- Review your project’s setup on the Summary Page.
- Use the edit icons to make changes to any step if needed.
- Once confirmed, click Publish Project.
- A confirmation message will appear: “Project successfully published”.
- Click View Project to open the Project Dashboard.
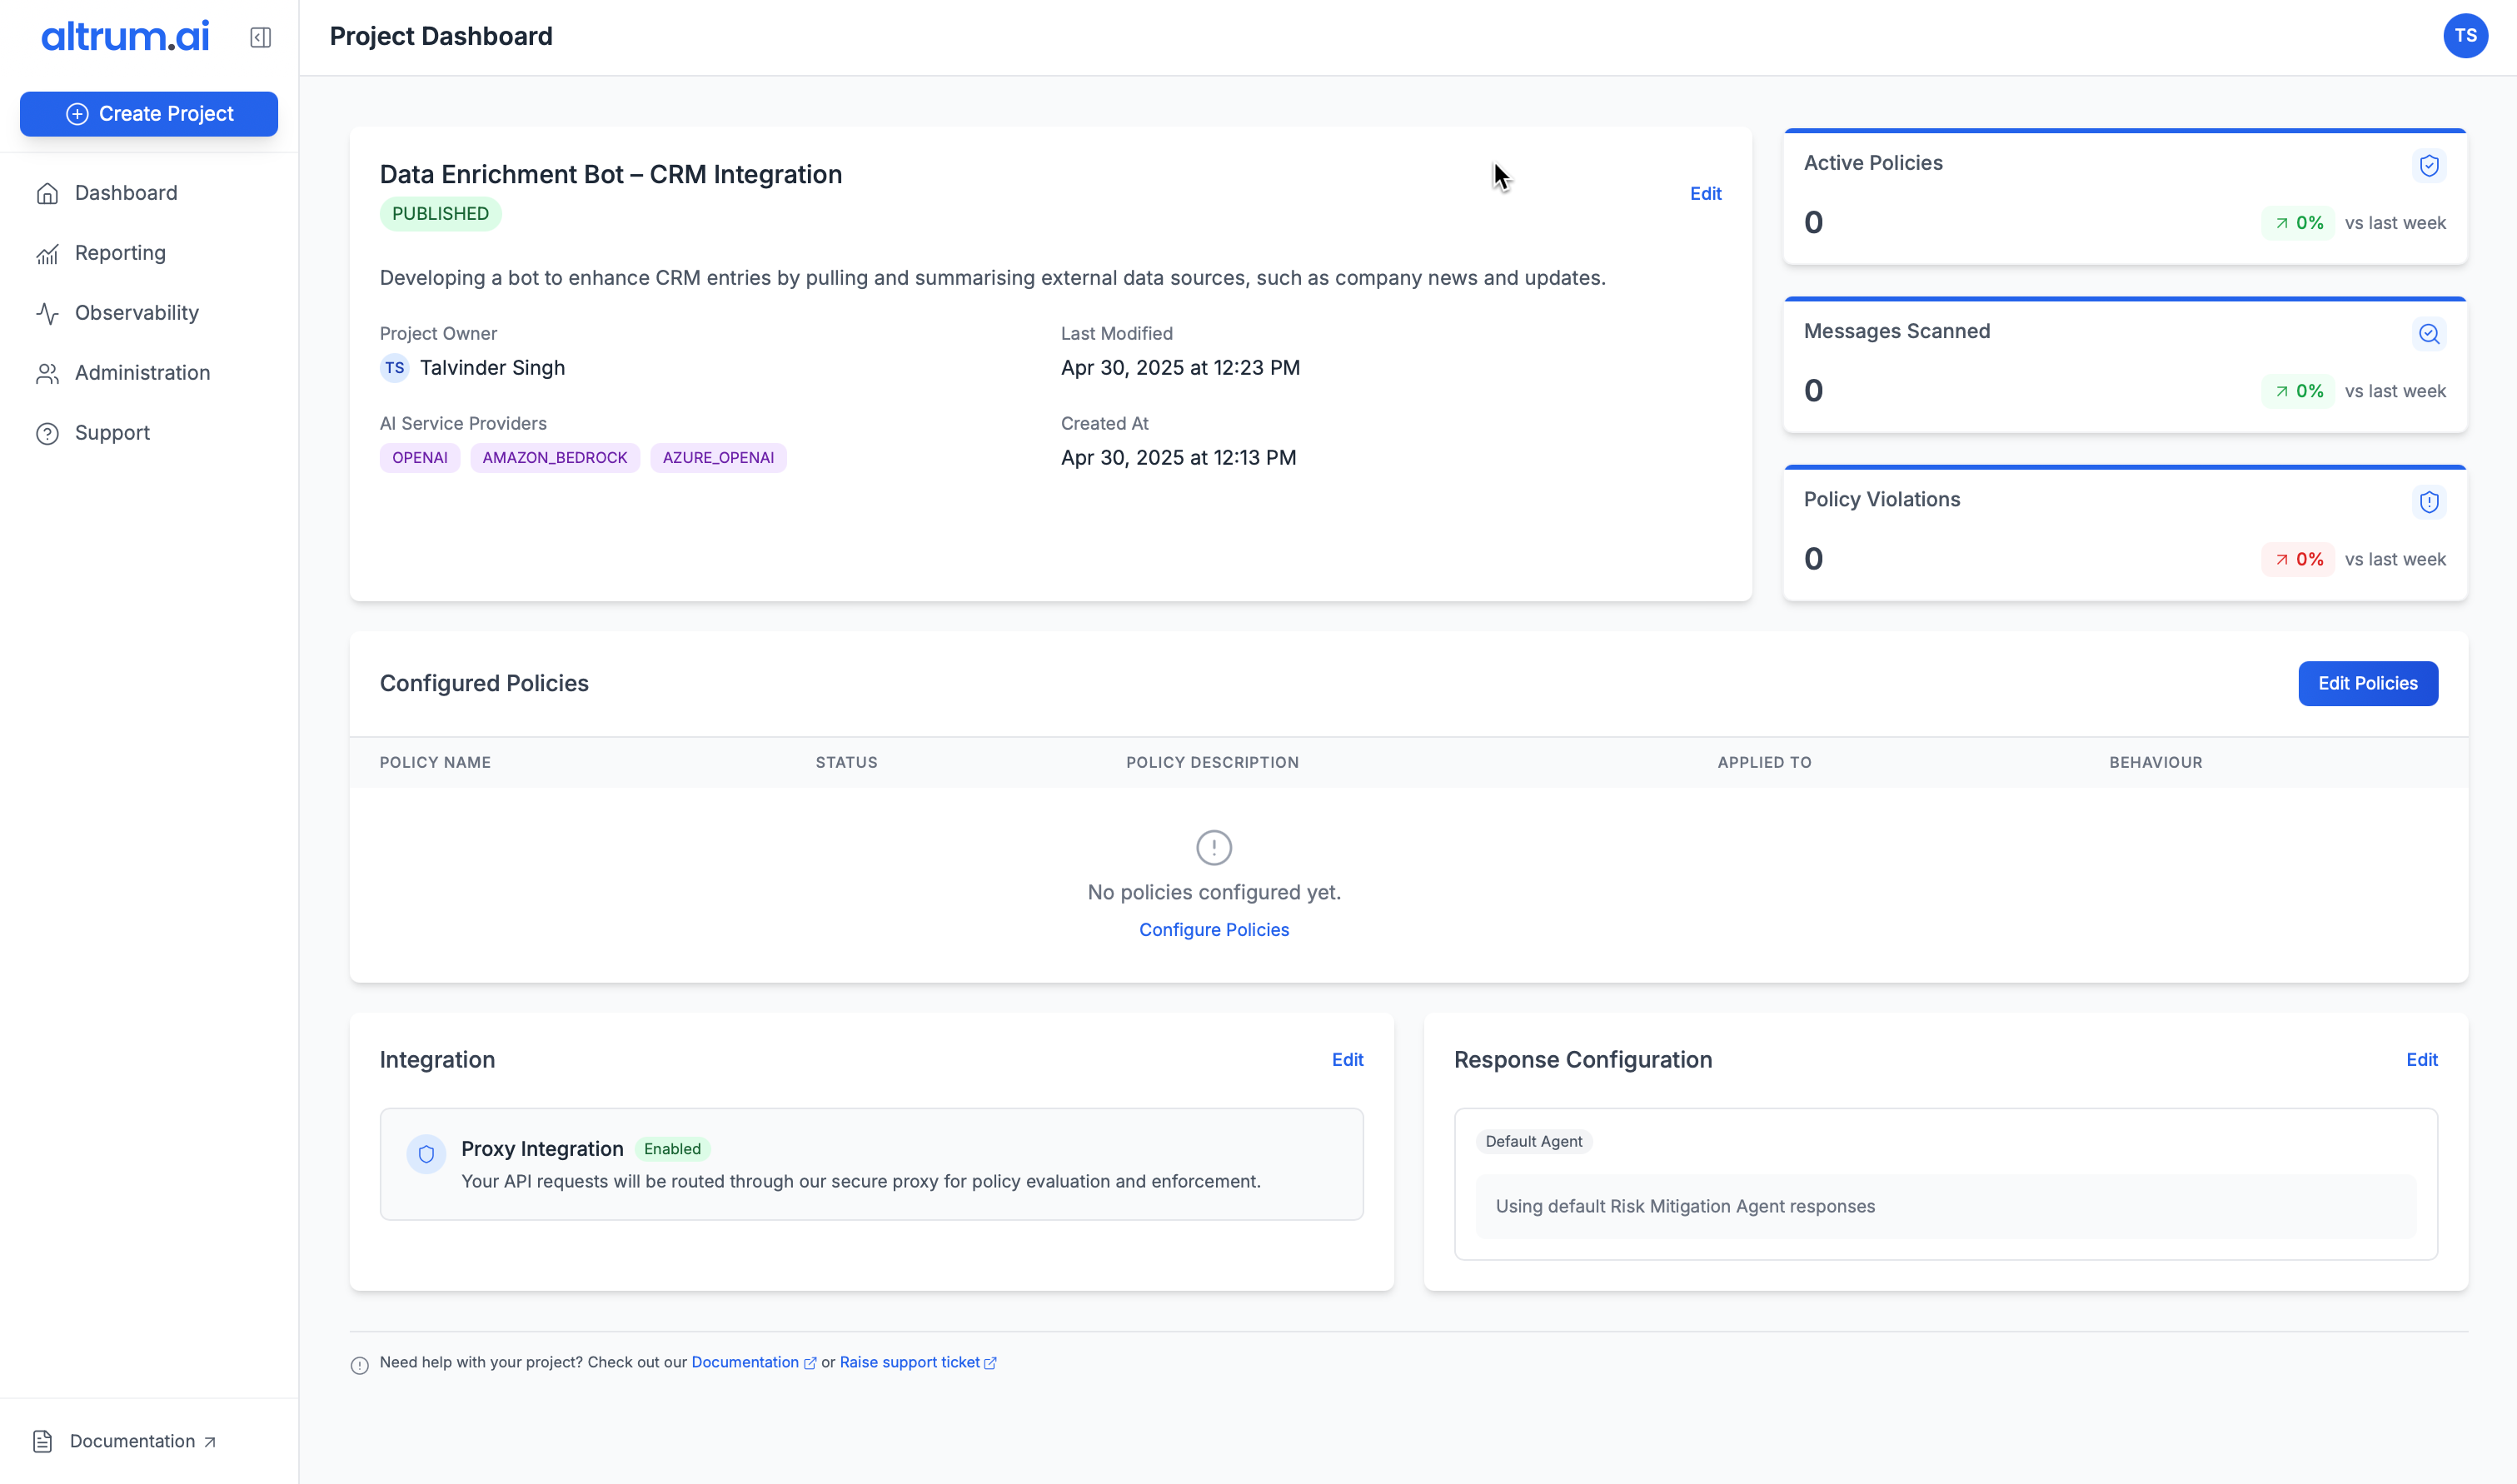
Project Dashboard
Once a project is published, the Project Dashboard becomes the central view for all configuration, activity, and policy enforcement related to that project. Key sections include:- Project Details
- Connection Status
- Policy Summary
- Integration Details
- Usage and Violation Metrics
Editing Project Details
To Edit an Existing Project:
- Navigate to the Dashboard.
- In the Project Table, find your project and click the ellipsis (⋮) in the Actions column.
- Select View Project.
- On the Project Dashboard, locate the Project Details quadrant.
- Click Edit to return to Step 1 of the setup process.
- Modify the necessary fields and click Save Changes.